I recently built my first drone! …And I broke it. It was mid-flight, where I lost control of the drone and it instantly bolted straight to the ground, cracking the frame too. Toothpick frames are designed to be easy to assemble and lightweight. However, as the name suggests, they can be prone to cracking on impact. So now I’ve taken it upon myself to design a more reliable and cost competitive frame.
My OG Toothpick Frame
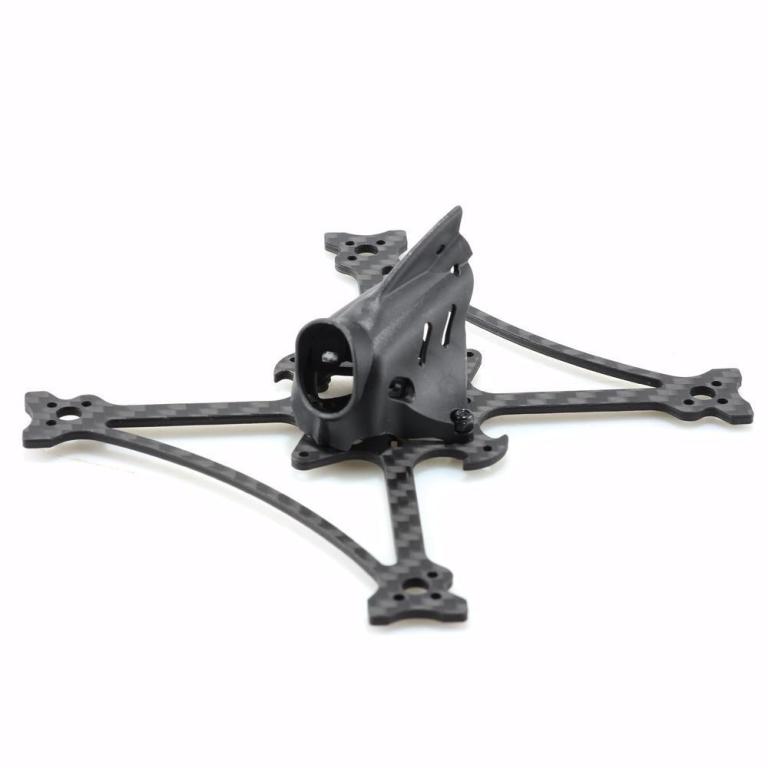
This frame is pretty sturdy and has lasted a couple months with a lot of crashes. Although the canopy tends to crack very quickly, the stack fits well alongside the camera. Here’s the specs:
- Bought from YourFPV
- 3″ frame
- 2mm plate thickness
- 11.7g
Additional Specs
- Wheelbase: 120mm
- size: 108x108mm
- Installation holes:16x16mm, 20x20mm, 25.5×25.5mm
- Support camera:14mm
- 6mm motor holes
Initial Designs
Toothpick frames on the internet look very much the same, but with their own unique nuances – some have jagged arms, while others have bulges on the end. I decided to go all out with flashy arms by designing the ends in the shape of our logo initials – CUDS:
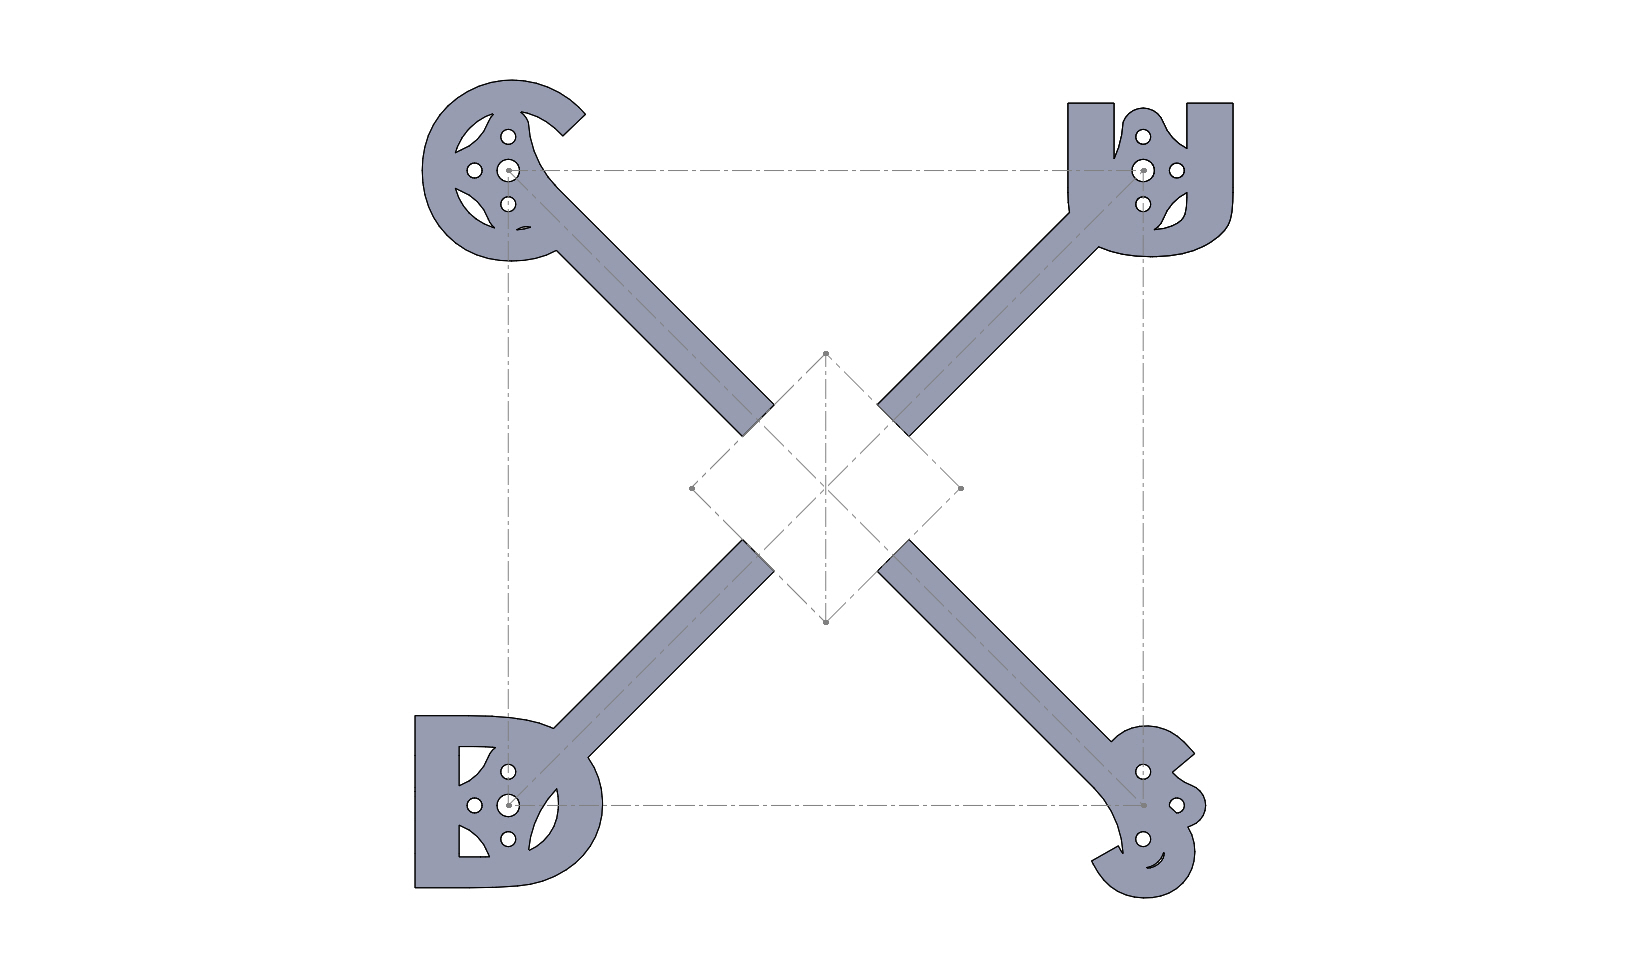
From these initial designs, I decided to go for the one on the right, where the motor mounting holes are places directly in the letters. This design looks a lot cleaner than the one on the left. The next phase of the design will focus on:
- Trying out various shapes of ‘S’
- Making the letter thicker to improve their strength
- Adding a canopy mount in the middle
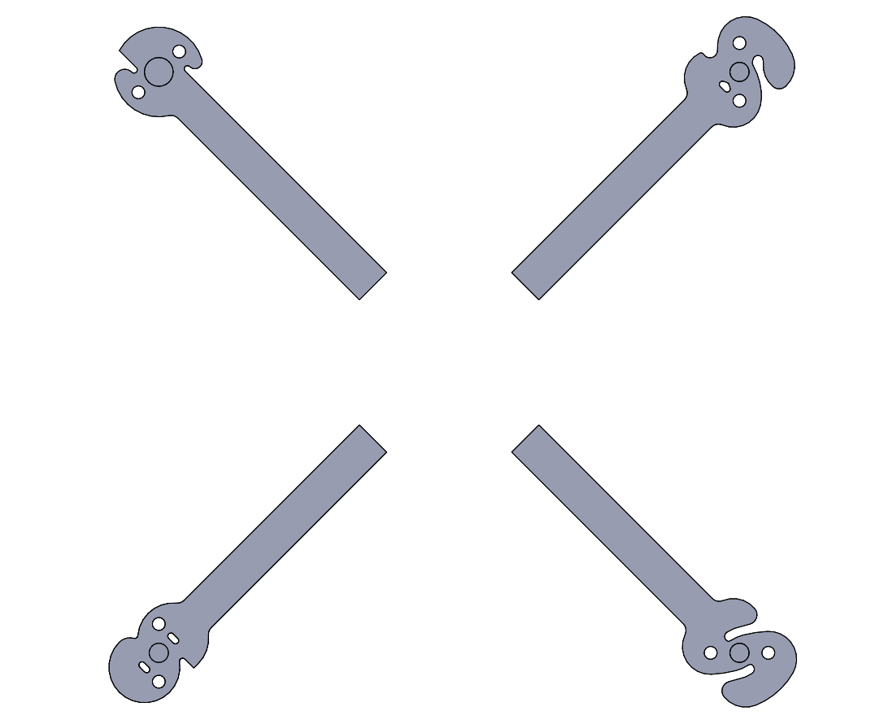
Various S shapes
The ‘S’ shape is the most complicated part of the design as I had to balance the shape with the stiffness and hole tolerances specified by the manufacture. Here is a breakdown of the different shapes:
- Top Left: Small and compact, so will be pretty stiff
- Top Right: Thick shape, but the slot next to the hole may reduce stiffness
- Bottom Right: Full ‘S’ shape is very realistic, but could flex a lot
- Bottom Left: Slender. The slots close to the holes could be weak
Canopy Mount Design
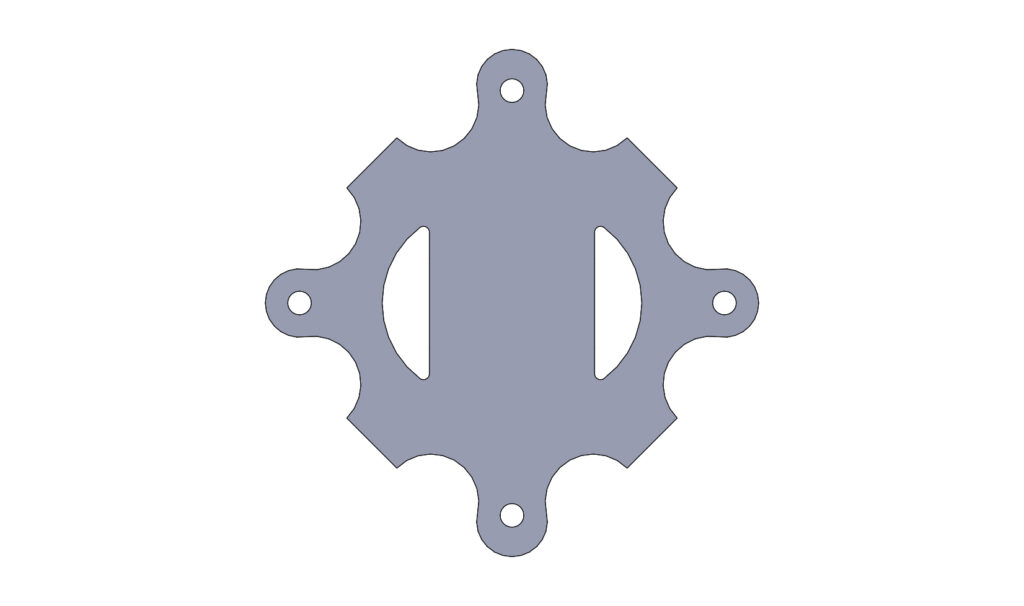
The canopy mount was designed to fit these specifications:
- 25.5 x 25.5 mm holes for the canopy and stack
- Holes in the middle to attach the battery with a Velcro strap
- No visible areas of stress concentrations
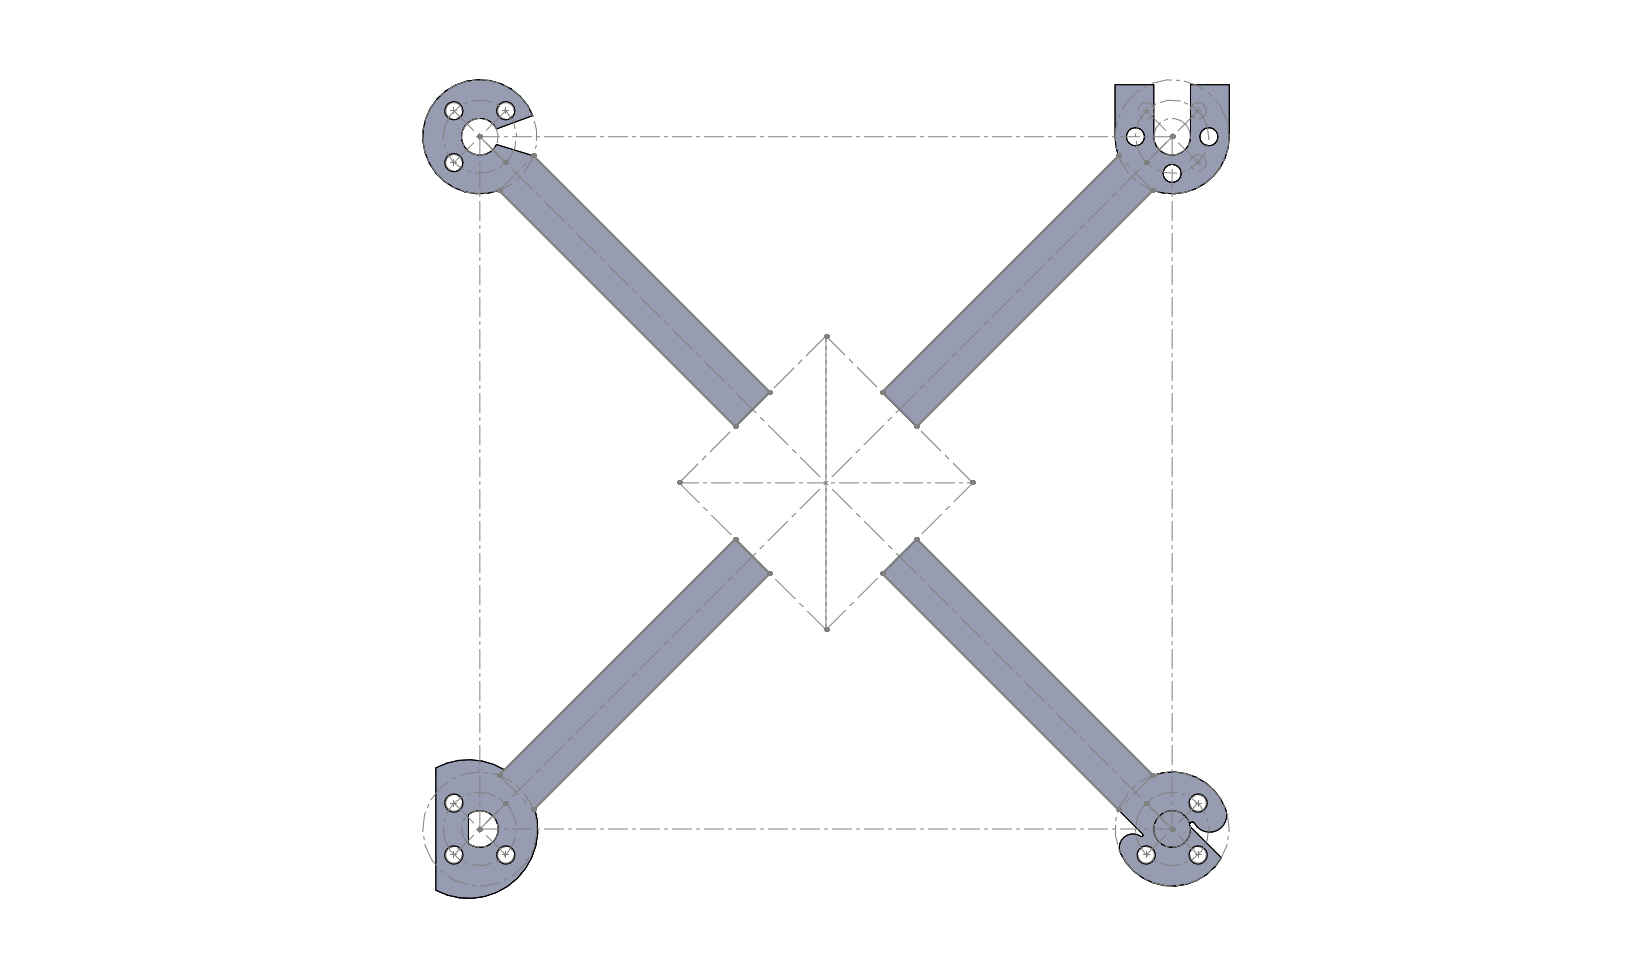
Final Design
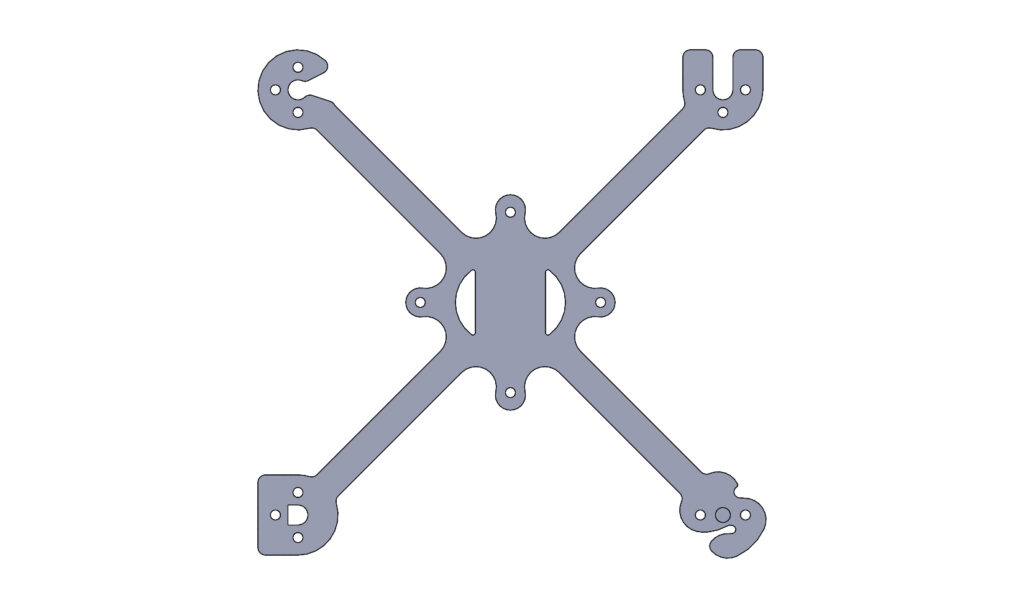
Voila! My final design has all the improvements of the iterations mentioned previously. The letters are a lot thicker, which should help increase the stiffness and reduce fracture chances and the canopy mount fits snugly with the arms.
After I get the frame manufactured in carbon fibre, I’ll fly it till it breaks and post an update with how well it actually worked!